The old film effect has now become popular for Flash artists to put in their animation as a Flash back to past memories or pretending to watch an old film. Either way, this tutorial will teach you how to create this effect to put for your animation or as a image effect.
Step1) Create New File (Note: Actionscript 2.0 only) and change the properties shown in the image below:
Step1) Create New File (Note: Actionscript 2.0 only) and change the properties shown in the image below:
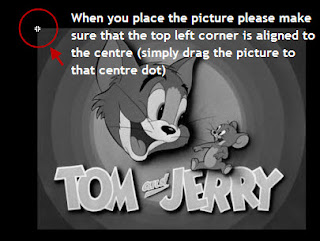
Step2) Copy and Import the following Tom and Jerry picture if you like or get your own picture which is about 300px by 225 px. (It will be best if you get a black and white picture or an image from an old film)
Step3) Ok, after you have imported the picture to the library by: File>Import>Import to Library, you will need to create an empty movie clip by: Insert>New Symbol (Ctrl+F8). Name it anything you like and press Enter.
Step4) Now you will be inside your symbol (AHH it's all black!!) but dont worry, just drag the Tom and Jerry (or the picture you've imported into the library) to the stage. (Note: If the Library Panel is not opened, simply go to Windows>Library (Ctrl+L).

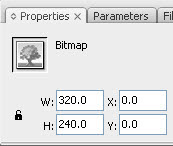
Step5) Select your image and adjust the size and position of your image by inputting the following into your properties panel: (PS the width and height does not have to be exactly the same but something close would be fine)

Step6) Go back to scene one by clicking on it at the top:
Step7) Once you are at scene1, drag the movie clip you were just in from the library to the stage. Then you will need to centre the image by using the Align Panel. Windows>Align (Ctrl+K)
Click you image and align it to the centre of the stage:
Step8) Now right click on your image and select Actions (F9) to open up an actions panel and copy and paste the folowing code:
onClipEvent (enterFrame) {
this._x = Math.random()*2+90;
this._y = Math.random()*2+60;
this._alpha = Math.random()*30+50;
}
this._x = Math.random()*2+90;
this._y = Math.random()*2+60;
this._alpha = Math.random()*30+50;
}
Now you're done!! Test your movie now!!


It's a great effect and the instructions are very clear and easy to follow. Thanks for sharing :)
ReplyDeleteTo Liam:
ReplyDeleteYou're welcome and I hope this tutorial has helped you somehow
This is a seriously useful technique for those who wants to create the effect of old movies and become nostalgia about them.
ReplyDeleteAppreciate your sharing the techniques and commenting on my site.
Thankyou very much for visiting and taking the time to read my posts. I really appreciate it!
ReplyDeleteEXCELLENT!! but I got a problem, when I test the movie the movie just display only a fragment of the picture... its on the top left of the stage... what can I do
ReplyDeleteThankyou for telling me the mistake I have made. There was an extra step you had to make. I will update the tutorial now thanks for mentioning it.
ReplyDeleteWaw! good Example then good expalanation. But only one problem. Finally the image dispalyed on the topleft corner.What can i do?
ReplyDeleteThanks, seems like i have missed one important part but i have updated the tutorial now! All you need to do is when you are inside the new movie clip, drag your picture so the top left corner is aligned to the middle and that should fix your problem =D
ReplyDeletethanks for the tip
ReplyDeleteit is really great
bt on playing the movie the layer below the mc creating disturbance,
hello
ReplyDeletegreat
can u please make understand each variable u use in action script
so that it will be great for new comers to understand action script
ur doing a great job but would you show me how to make a water animation
ReplyDeleteyeah really its too easy to do ... thanks alot buddy
ReplyDelete